Raised Garden Bed Instruction Sheets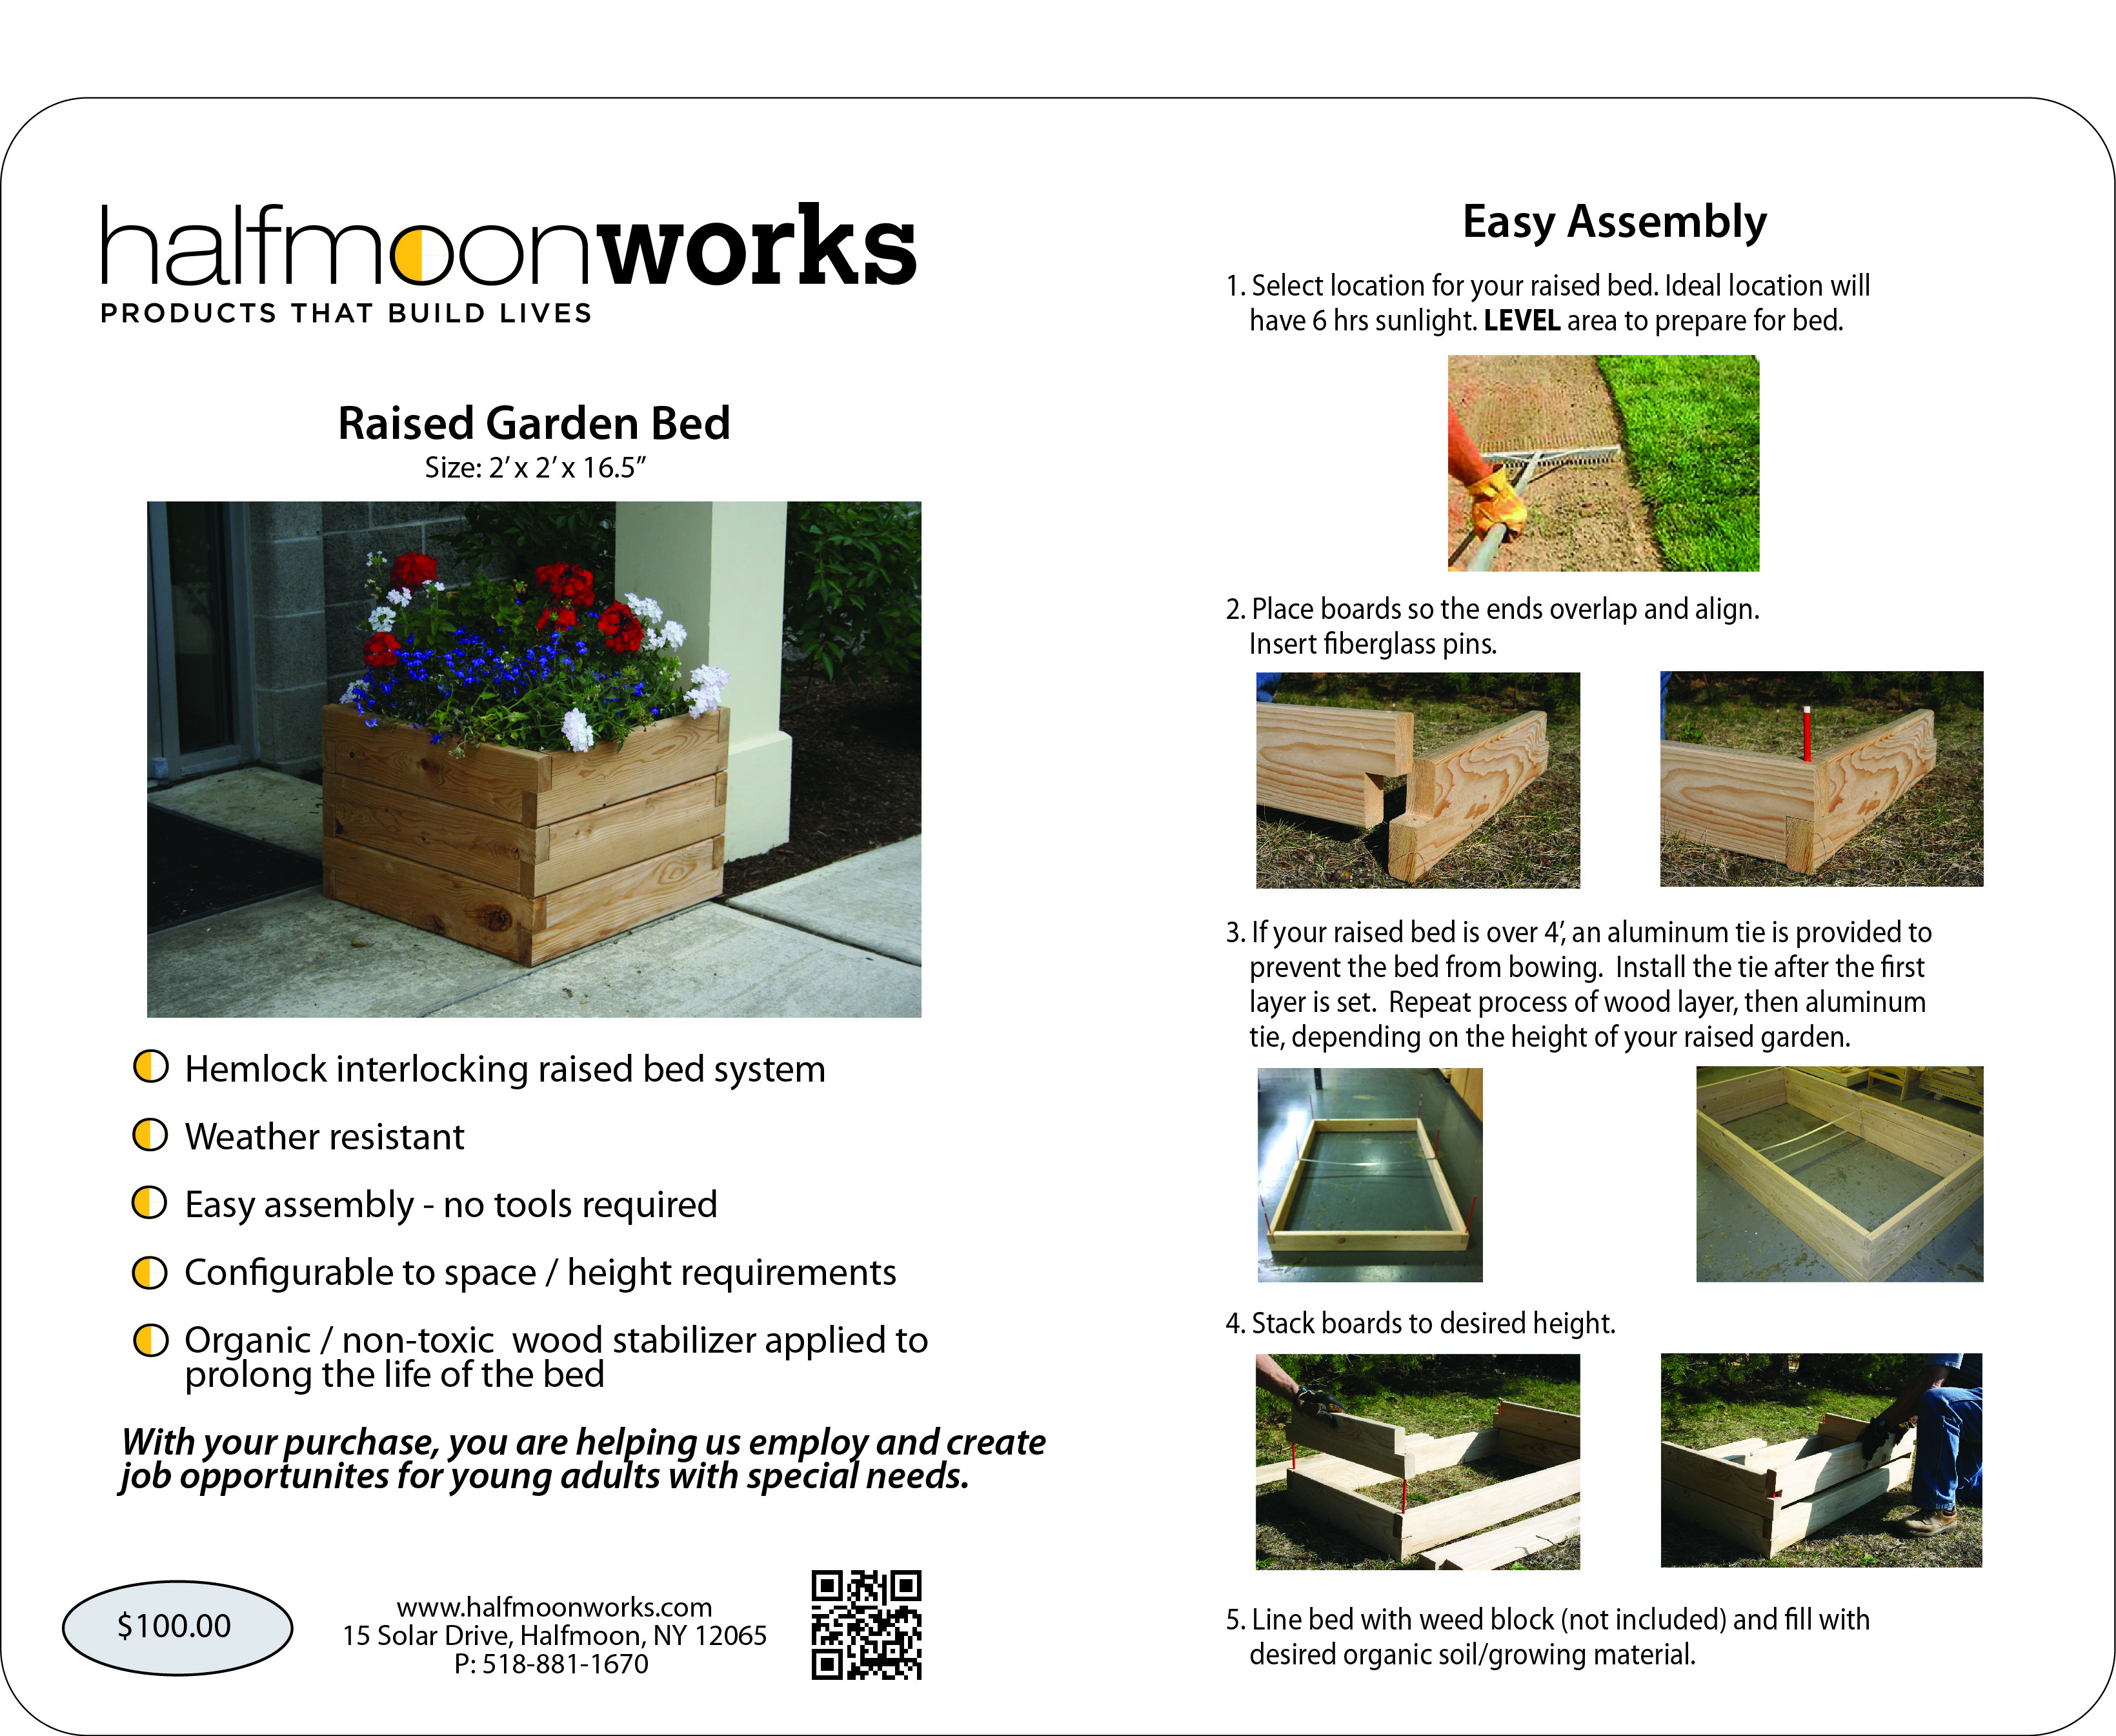

Sunflower seedlings will come up in one or two weeks. They will start out slowly, then speed up their growth rate. A great way to get kids involved is to have children be responsible for watering them, weeding around them and adding mulch around the plants.
Harvesting of sunflower heads is quick and easy–but you may need a ladder or stepstool if you are growing tall varieties. Watch the birds; when they start going after the seed heads, cover the heads with cheesecloth to protect the seeds. The seed heads will be ready to harvest when their backs are brown and dry and no traces of green remain.
Cut off the heads with a foot or two of stalk. Hang them upside down in a dry and airy place. When the seeds are dried, rub them off with your hand and store them in an airtight container. Don’t wash them, as this could cause them to mold.
To roast sunflower seeds, place a single layer of raw dehulled kernels in a shallow pan. Roast in a 300 degree F oven for 30 to 40 minutes or until they are brown and crisp. Stir occasionally. Remove from the oven. One teaspoon of melted margarine may be added if preferred for each cup of seeds; stir to evenly coat. Place the seeds on absorbent paper. Salt to taste. Store in a tightly covered container.
For salted in-the-shell seeds, cover unhulled seeds with salted water in the amount of 2 quarts of water to 1/4-1/2 cup salt. Bring to a boil and simmer for 2 hours. Drain and dry on absorbent paper. Seeds may also be soaked overnight instead of boiled. Then proceed as for the roasted kernels above.
Your flowering-hanging basket can bloom and thrive for many months – with a little help from you. Follow these easy guidelines to keep your plants healthy and beautiful throughout the season.
Most flowering hanging baskets will tolerate a wide range of light conditions, though some will balk at the heat and drying of all-day sunlight or the dimness of all-day shade. Match your plant with its light location for best results.
Do not wait for wilting as you cue to water! Flowering plants do best if you never allow them to wilt. Take extra care with watering, since hanging baskets dry out faster than garden plants, because they are exposed to more wind and warmer temperatures.
Under average conditions, flowering plants in 10-inch diameter hanging baskets use 16 to 32 fluid ounces of water per day. With proper watering, the plants should last 2 to 4 days between waterings.
Be sure to water thoroughly. If the basket dries out, the soil may shrink and allow water to quickly run out the drain holes, fooling you into thinking it is thoroughly watered when, in fact, the water is bypassing the roots. Make sure the basket becomes heavy with water, about 7 to 9 pounds. You may need to re-water the basket again in 15 minutes – or soak it in a bucket of water for 5 to 10 minutes to thoroughly moisten the soil.
Even if you have never allowed them to wilt, your plants may develop yellow leaves and poor flowering, which can indicate a need for fertilizer. Add 1 to 2 teaspoons per gallon of a water-soluble fertilizer that has 15 to 20% nitrogen, into the watering can every two weeks and your baskets should stay green and flowering.
You can also use plastic-coated, slow-release fertilizer beads, available from some greenhouses and garden centers. Apply one to two tablespoons to the soil surface at the start of the summer to last all season long.
Keep in mind that if a little fertilizer is good, a lot is NOT better. Too much fertilizer can burn roots and damage plants. Ask someone at your local garden center or greenhouse for help and invest in a little fertilizer to keep your plants flowering.
With proper watering and fertilizing, your basket plants will flower so much that you may need to remove dead flowers and seedpods. This helps keep the plant looking its best – and is a nice way to relax after a long day, which is what gardening is all about.
Do not forget your flowering hang-ups when you go on vacation. If you can’t get a “plant-setter” to water them while you are gone, take them down from their hangers and set them on the ground in the shade. With a thorough watering before you leave, most plants will last a week on the ground in a well-shaded location. Flowering may be reduced when you first rehang you plants, but they will soon return to their summer glory.
If your plants get large and overgrown, right before you go on vacation is a good time to trim them back and remove some of the extra growth.
I welcome any sign that spring is near. One of those signs is seeing the first bluebird of the season. Anyone who has ever seen one knows the feeling of surprise and joy that accompanies a bluebird sighting. Since they are not overly shy of humans and nest and feed in open areas, bluebirds are some of the easiest birds to watch and learn about.
Bluebirds are territorial so once you’ve seen them in an area, odds are good that you’ll be able to visit and observe them on a regular basis. Those with a large lawn or property adjacent to open fields can attract their own resident bluebirds to enjoy on a daily basis during spring and summer. I am lucky to be able to host a pair of bluebirds, and the little effort needed to attract them to your yard is amply rewarded by the color and liveliness they add to the little bit of the world we call our garden.

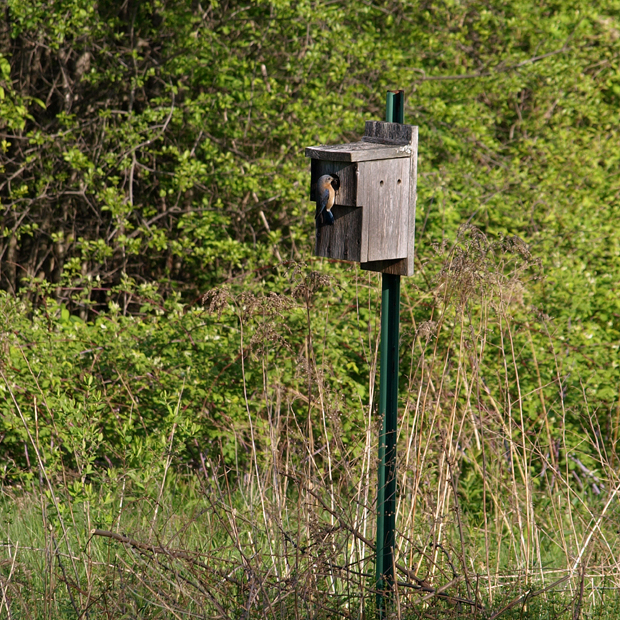
The easiest way to lure bluebirds to your property is to provide bluebird-nesting boxes. If you would like plans for building a bluebird-nesting box, go to the NYS Bluebird Society webpage. If you purchase a bluebird box, all you need to know is where to mount it to attract bluebirds.
Your bluebird box should be mounted on a metal post. Mounting on trees is not advised, since it may allow predators to gain access to the box. Your bluebird-nesting box should be mounted with the bottom a minimum of 3’ from the ground. 4’ to 5’ is considered optimal. In our cold climate, the box should be mounted with the entrance facing southeast, away from our colder prevailing wind. Since bluebirds hunt for insects in lawns and meadows, it’s best to locate your box adjacent to these open areas. To help fledglings survive, try to place your boxes where there is a fencepost or tree within 100’ of the entrance hole. This will give young bluebirds an easy, safe perch to reach on their first flight from the box.
Since bluebirds are territorial, nesting boxes should not be placed closer than 300’ apart. If you have swallows in your area, they may compete with bluebirds for nesting boxes. In this situation, it may be necessary to place two boxes 5’ to 15’ apart. The swallows will occupy one box, leaving the other available for the bluebirds. Since bluebirds are on the increase in New York State, properly placing nesting boxes on your property is very likely to attract younger pairs of bluebirds with the possibility that they and their offspring will return to your area year after year.
To lure nesting bluebirds to your area, have your nesting boxes up as early in spring as possible. As soon as the bluebirds return to the area in March, they’ll start investigating possible nesting sites. If all goes well, you’ll have a nice clutch of eggs by early May.

After that, it is simply a matter of keeping the boxes clean and safe. In fall or early in spring before the bluebirds arrive, the nesting box should be cleaned out. Remove any old nesting material and then scrape out dirt and debris with a putty knife or wire brush. Old nesting material should not be left on the ground near the nest but removed from the area to prevent parasites that can harm baby bluebirds in the nest. Washing out the nesting box with a spray of 1/10 bleach/water will sterilize the box, and it is ready for the season.
If you’re going to give bird feeding a try for the first time, the first thing you’ll need is a bird feeder. There are a lot of them out there to choose from so how do you make sure you’re getting the right kind? Here are a few feeders to consider.
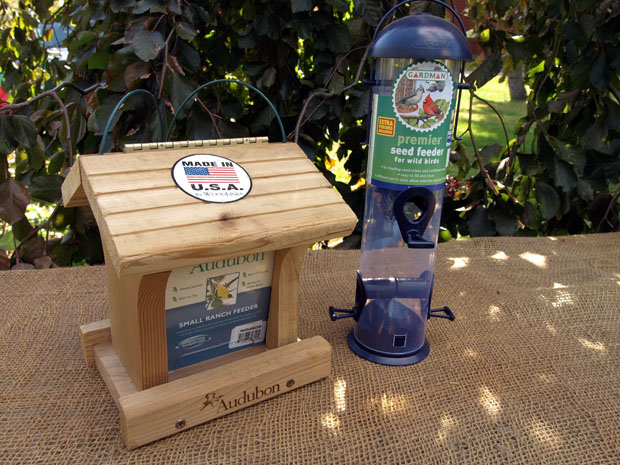
Both of the feeders shown above will certainly hold and dispense bird seed and would be perfectly fine in a world without squirrels. These two feeders and any like them are what I call ‘squirrel fodder’. It’s a fact of life that feeding the wild birds attracts squirrels. What kind of feeder is there that can discourage squirrels?
Here are three that I call ‘squirrel excluder feeders’

These feeders (and there are others like them) use the weight of the squirrel on the perch to move gates that cover the feeding ports. Small wild birds aren’t heavy enough to activate the mechanism but squirrels are. This can be quite effective, and I like the one in the middle because it holds a lot of bird seed. There’s another type off feeder that I like (indeed I own and use one) that I call ‘impossible’ feeders.
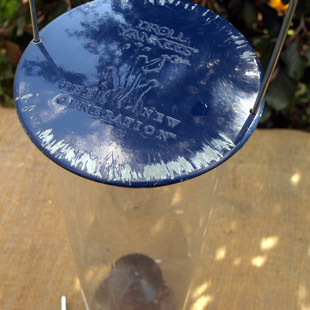
A feeder that’s impossible for squirrels


This is a feeder made in America by Droll Yankee. They call it the Yankee Dipper. On the left is a new one and on the right is the one I’ve used for several years. Why do I like this feeder so much?
Large capacity: The more your feeder holds, the less often you’ll need to fill it. This is something you’ll appreciate during the coldest days of winter. The Yankee Dipper holds 5 lbs. of seed.
Easy to disassemble: A feeder that comes apart easily is easier to clean.
Simple and effective squirrel control: The Yankee Dipper is long enough so squirrels can’t reach the feeding ports when hanging by their rear legs from the top of the feeder. Yes, the reach of a squirrel was researched when they designed this feeder. The perches at the feeding ports are spring loaded. They are strong enough to support perching birds but dip down under the weight of a squirrel.
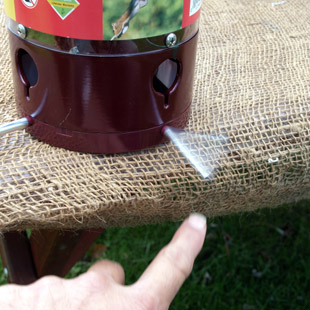
The only damage the squirrels have done the my Yankee Dipper is to the metal lid. Not bad for 8 years on the job. I should be able to get another 20 years out of this feeder.
To get the most enjoyment out of wild bird feeding make sure you invest in a good bird feeder. It is better to buy a good one that the squirrels can’t destroy than to keep replacing cheaper ones…in the long run a good feeder is less expensive and you also get the satisfaction of watching squirrels slide off the feeder without getting a snack.
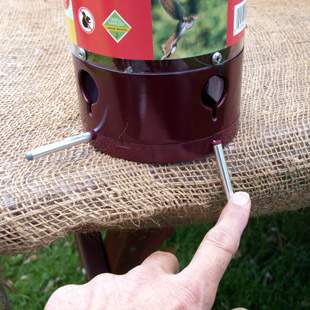
For those of us that already own a bird feeder, now is the time to get it all cleaned up for the season. This is why you shoud get a feeder that disassembles easily. Mine comes apart with just four small screws.

Clean your feeder one a month to keep wild birds healthy

We need to keep the feeders clean to keep the birds healthy. In the wild bird, diseases can’t spread easily from bird to bird since the food is spread all around and the birds have little common contact. The feeder attracts all the birds to only a few feeding ports so it is important to keep those ports clean. They are all eating from the same plate so to speak so is best to keep that plate clean.
After the feeder is apart, wash it in very hot soapy water. Pay close attention to the inside and outside of the feeding port since this is where diseases can be spread from bird to bird. An old toothbrush can come in handy. After it is clean, soak all the feeder’s parts in a mix of 1 part chlorine bleach to 10 part water. This will kill any germs. Let it dry thoroughly and reassemble. Now you’re all set to fill it up.
Our fine feathered friends
Winter weather sure makes our lives miserable sometimes. As difficult as it can get for us, it’s hard to imagine what it’s like for the wild animals out there…especially the tiny birds that we share winter with. How in the world do they stay warm?
Tufted titmouse

To endure such unrelenting cold, winter birds need to stay active, and their activity is fueled by calories and protein. The trick to attracting birds is providing calories and protein in forms that they prefer like sunflower seeds. Black Oil Sunflower is higher in calories per pound than Gray Striped Sunflower. Many people believe that striped sunflower must be better because it costs more. In reality, the reason striped is more expensive is due to supply and demand. Striped sunflower can be machine hulled with the kernel intact. Hulled sunflower kernels are consumed by humans in a variety of forms. These alternate demands on the supply of Gray Striped Sunflower are what keep the price higher than Black Oil Sunflower. Black sunflower is used only for bird feeding. I’ve found that the smaller black seed are more easily handled by chickadees and other small birds.
Add more black oil sunflower to their feeder for extra calories.

The second most important food for wild birds is fine cracked corn. Cracked corn appeals to ground/platform feeding birds like cardinals, doves and juncos. When you shop for cracked corn, be sure you get FINE cracked corn. Medium or coarse cracked corn is too large to be beneficial to small wild birds.
Supercharge birds with suet.
Suet provides maximum calories to help birds stay warm and is a favorite of nuthatches and woodpeckers. Suet comes in lots of flavors like peanut, fruit and nut, blueberry and more. I like to buy the ten pack so I have a ready supply during these coldest days of winter.

Keep your feeders topped off.
Make sure that you keep your feeders topped off. Once you start feeding the birds, they become dependent on the supply you’ve been providing. This is the time they need the food the most.

Water attracts lots of birds in winter.
During extended periods of sub-freezing weather, birds will have a hard time finding water. If you provide fresh water, the traffic to your feeding stations will increase dramatically. You can refill the water source each day or use an electric birdbath warmer to keep ice from forming. I only plug mine in during the very coldest days of winter.
A birdbath heater makes sure that water is available even on the coldest days.

We were recently asked why there aren’t any products that had lawn food, crabgrass preventer and weed killer in one bag. The gentleman thought this would be a great idea since it would save a lot of time. His question reminded me that there is a lot of confusion about the differences between weed killer and crabgrass preventer. Let me try to straighten this out.
Crabgrass, unlike most lawn weeds, grows from seed that the mother plant produced the previous summer. The mother plant dies completely over the winter never to be seen again. In early spring (starting about now) the seed germinate and start to grow. Crabgrass preventer is an agent that dissolves and forms a coating on the surface of the soil. ANY seeds that try to sprout and push a root through that barrier are killed. The best way to time you crabgrass preventer application is to keep an eye on a forsythia bush that is growing in your yard or neighborhood. You MUST have your crabgrass preventer applied before the flowers have completely fallen off the forsythia. It is a convenient coincidence that crabgrass seeds germinate at the same time that forsythias are flowering.
Spring weather can be fickle but, if you use the forsythia as your clock, your crabgrass preventer will always go on at the right time. Remember that crabgrass preventer forms a thin film on the surface of the soil so make sure that all your raking is done before you apply crabgrass preventer. If you rake afterward, you will scratch up the barrier and crabgrass will be able to grow. Dandelions, plantain and other lawn weeds are perennial plants. They come up from a root system that was established the year before and they survive the winter. Because they are coming up from roots not down from seeds, they are immune to the effects of crabgrass preventer. Lawn weed killers do not prevent weeds, they kill existing weeds. Weed killers (liquid or granular) are basically plant growth hormones that, when applied at the proper time, cause the weed to die from the shock that occurs when the weed tries to grow faster that it is able to. Sort of like an overdose of stimulants. If weed killers are applied too early in the season (when nigh time temperature are below 50 degrees) they will not kill the weeds.
During the cool days and nights of early spring, the weeds are not growing rapidly enough for the growth hormone to cause the level of shock necessary to kill the weed. Every June people complain that the weed killer they used is “no good” or “doesn’t work”. The real reason it didn’t work is because it was applied WAY too early. Sure, you can look out in the yard and see those buggars out there growing but it’s too early to get rid of them unless you want to dig them out. Bide you time and strike when the iron is hot (or when the soil is warmer). The best time to apply weed killers will be during late May or early June. If you apply it sooner you are wasting time and money.
Another important thing to remember about weed killer is that they are absorbed ONLY through the leaves of the weeds. Because of this, weed killers MUST remain in contact with the leaves of the weeds for a minimum of 24 hours (48 is best) for the weed to absorb enough to be killed. Many who use liquid weed killers will soak and soak an area to be sure they get the weed killer into the soil. Any weed killer that isn’t actually touching the leaves is wasted. Since leaf contact is the name of the game with weed killers, don’t mow the lawn prior to applying weed killer. If you mow, you’re removing the leaves that absorb the weed killer. Keep an eye on the weather and make sure that you don’t apply weed killer when rain is expected within 48 hours after the application. Even a quick shower is enough to wash the weed killer off the leaves, rendering it ineffective.
These cool days of September present the best opportunity for starting a lawn from seed. Don’t dally; you want to get the grass seed started right away to take advantage of the last of the season’s heat. Starting a lawn from seed is one of the more challenging gardening tasks, mainly because of all the pre-seeding groundwork.
The first step in starting a lawn “from scratch” is to turn organic matter (and lots of it) into the area to be seeded. The more organic matter that is blended with the soil, the thicker and more drought resistant the lawn will be for years to come. Peat moss, capable of holding over twenty times it’s weight of water, is the best choice for improving the soil where a lawn is to be planted. It comes in dry, compressed bales so, it’s easy to handle and use. In very sandy soils, you’ll want to turn one 4 cu. ft. bale into each 100 sq. ft. (10′ x 10′) area to a depth of about 6″. This sounds like a lot of peat moss but it’s worth the effort. For a large area it’s wise to rent or borrow a rototiller to thoroughly blend the peat moss with the soil.
Once the peat moss is turned in, the area should be raked as smooth as possible, then rolled smooth with a water-filled roller (another device worth renting for this project). After rolling (whew), any high or low spots will be obvious. Continue to rake and roll until the area has a contour you find acceptable. This is the hardest part but take your time to do it right since you’ll be looking at the area for a long time.
Once that’s done, lightly rough up the surface of the soil with a metal rake. Finally, it’s time to broadcast the grass seed.
Consult with the folks at your local garden center to determine the best grass seed blend for you particular soil and light conditions. For late-summer seeding, avoid cheap blends with large amounts of annual ryegrass. Broadcast the seed evenly at the rate specified over the area then roll it once more to press the seed firmly into contact with the soil. If it’s a large area, you’ll want to cover the seed with a light layer of straw; a small are can be covered with burlap or horticultural fabric. The reason the seed need to be covered is to keep the sun and wind from drying the seed while it germinates.
After all this is accomplished, you can start watering…and watering…and watering. This is the trickiest and most important part of the project. No matter how high the quality of the seed used, it won’t germinate unless the area is kept moist CONSTANTLY. It can’t be allowed to dry out; NOT ONCE, not even for an hour. IF IT DRIES, THE SEED DIES AND CAN’T RE-START. Premium blends of fescue and bluegrass will take 2 to 3 weeks just to sprout, so be diligent about watering and don’t get discouraged. If you use a blend with perennial ryegrass as well as fescue and bluegrass remember, the ryegrass will sprout a week or more earlier. Even after the ryegrass sprouts, keep watering as if nothing has happened to insure the germination of the desirable fescue and bluegrass seeds.
After the young grass is up,, you should apply a controlled release fall/starter type of lawn food to stimulate quick root growth. Look for a starter fertilizer with a high middle number (phosphorus). When the grass grows to about 4″, mow off an inch (and no more) to promote even more root growth. In spring, apply another shot of fall/starter fertilizer to help the young grass develop a mature root system before the summer heats up.
Annual Ryegrass
Germinates quickly. Best used as a temporary cover to hold an area together while more desirable turf grasses take hold. Needs lots of water and dies after the first season.
Creeping Red Fescue
Fine textured with a deep green color, red fescue grows well in full sun or shade. It is drought tolerant and grows well in acid soils. Tolerates light or infrequent feeding.
Hard Fescue
Widely adaptable to almost any light condition, hard fescues are also extremely disease and drought resistant. They also tolerate infrequent and irregular feedings.
Kentucky Bluegrass
Fine-bladed bluegrasses generally require lots of direct sun and need to be fed and watered in greater amounts and more frequently than other turfgrass types.
Perennial Bluegrass
Easy to germinate and establish, perennial rye is compatible with bluegrass and fescues. Provides a tough turf suited for a play area and tolerates some shade. It needs regular watering during dry periods and gets by on modest feeding. “Repell” is a new, insect repellent variety of perennial ryegrass.
Poa Trivialis
Also known as rough bluegrass, poa trivialis is the most shade tolerant of all the turfgrass types. IT is also tolerant of wet soil. It does not do well in full sun and must be watered during extended dry periods.
Tall Fescue
Renowned for durability, tall fescue is extremely drought resistant due to its deep extensive root system. This is the turfgrass of choice for a heavy use area where the need for durability outweighs concerns of appearance